Today, we'll learn about the difference between stamping polish and foil stamping polish (also known simply as foil polish).
Stamping polish is an opaque, thicker, one-coat nail polish. It is used to stamp a design over a dried base coat of regular nail polish. You can layer different colors of stamping polish, and color in designs using stamping polish, to create more intricate, complicated looks.
Foil polish works in the same way as stamping polish, but it has a slower dry time than stamping polish. This allows you to take more time to apply nail foil over the tacky foil nail polish, without worrying about rushing to apply it so you don't "miss your window."
Foil polish also creates a more delicate, thinner, softer stamp. It is especially good for delicate images with intricate designs and many lines, such as words, fairies, butterflies, etc.
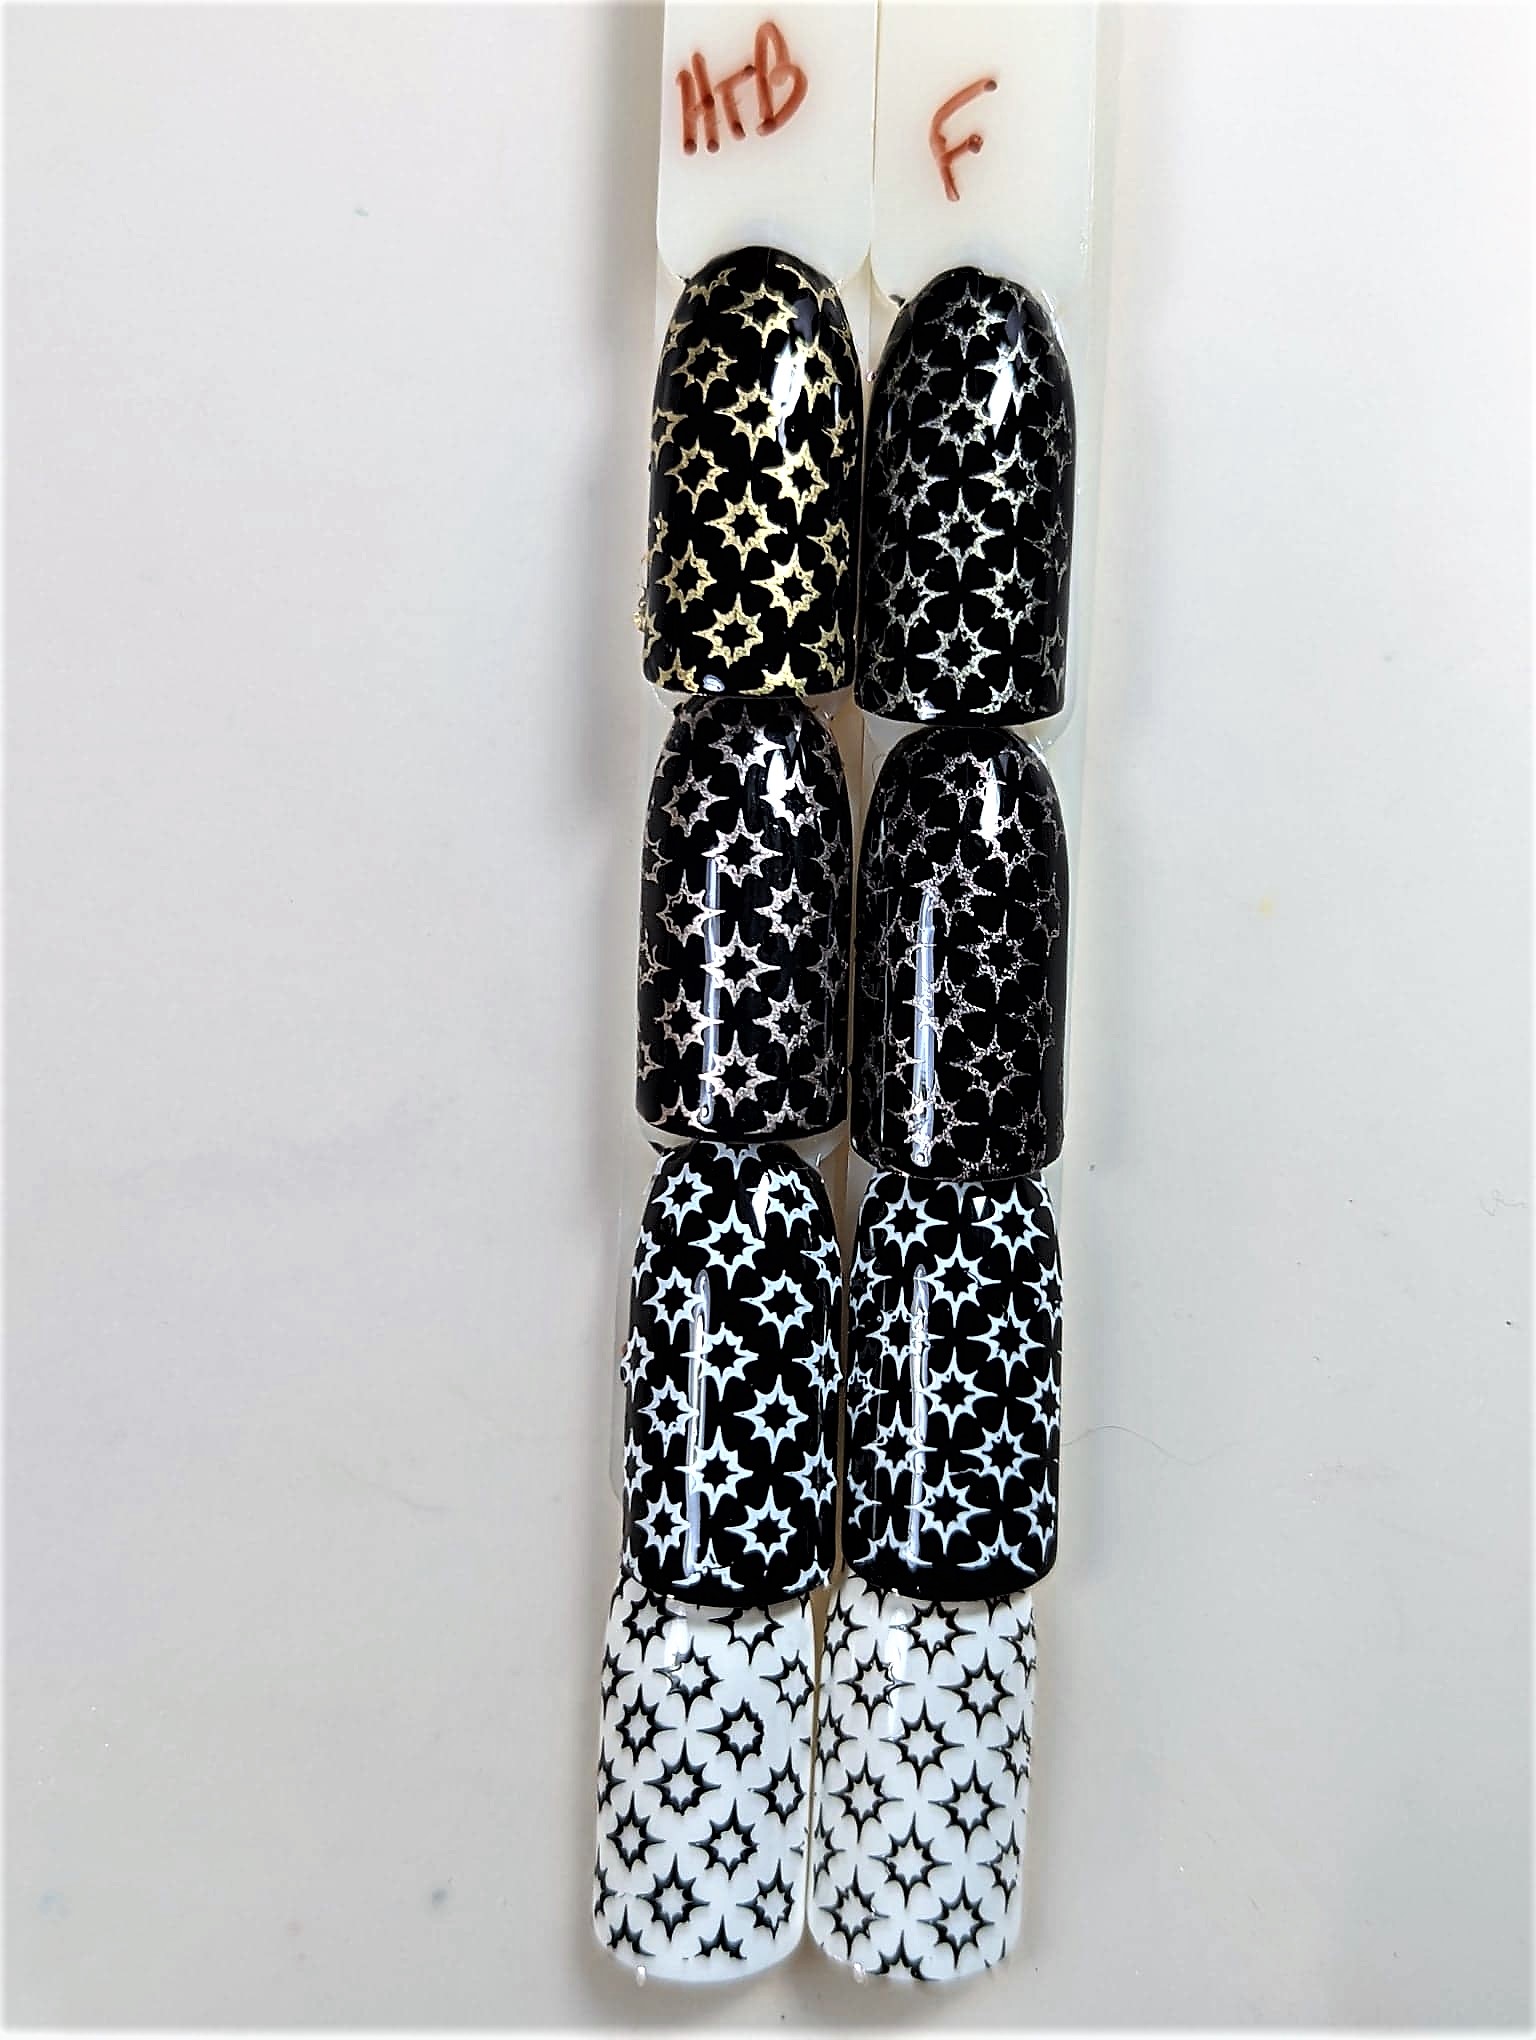
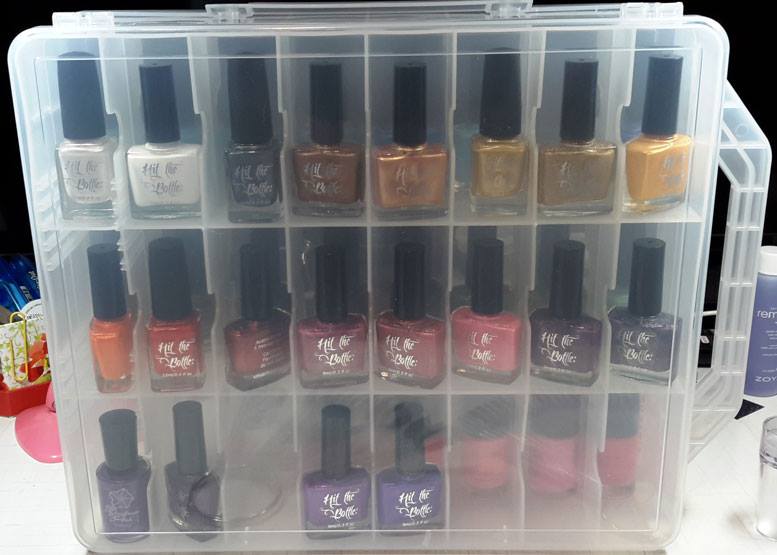
Hit the Bottle stamping polish on the left, foil stamping polish on the right.
When using foil polish, it is VERY important to use a water based top coat to complete your manicure!!! Due to the longer drying time of the foil polish, a regular top coat will SMEAR the foil polish like crazy! You do not want to ruin your hard work with a regular top coat.
We only carry brands we believe in, and our customers have shown great success with the SOPHi water based top coat (for use with foil polish as a stamping polish but no foil on top) and the Hit the Bottle Water Tight water based top coat (for use with nail foil).
One of our pro users says: "Foil polish takes forever and a day to dry - if you are going to actually use foil on it, use HTB's Watertight. If you are going to just stamp with it, use Sophi's water based top coat. I keep both on hand! HTB's is perfect for chromes, powders, foils, etc. and I use the Sophi for everything else."
PRO TIP: With any water based top coat - make sure that you really brush the excess polish off your brush. It should almost look like it's dry!
Now that you know the difference between foil polish and stamping polish, take a look at it in action here, using Moyra's FP01 black foil stamping polish and holographic nail foil!
Products used:
Lantern & Wren Decal Cutter (with detail brush on the other end)
]]>
Get the look!
Products used in this video:
Lantern & Wren Backgrounds stamping plate https://www.lanternandwren.com/backgr...
Mani Defender Liquid Latex https://www.lanternandwren.com/mani-d...
Simply Silver Clear Jelly Stamper & Scraper https://www.lanternandwren.com/simply...
Fab Ur Nails Wide Angled Clean Up Brush https://www.lanternandwren.com/fab-ur...
Hit The Bottle stamping polishes https://www.lanternandwren.com/hit-th...
]]>
In this image by @stunnin.nails, the white flower image was picked up onto the stamper and the shimmery blue was "colored in". A sticky base coat, like our I'll Stick Wichu, was then applied to the nail. The colored in image was stamped right on top of the sticky base to transfer it to the nail, and then top coat was applied.
"Leadlighting" is the technique whereby you color in an image already on your nail (you will put your top coat directly over your coloring). Generally this is done by stamping onto your nail and coloring in the design. You can also freehand an image onto your nail and then color it in, rather than stamping.
In this image by @jodies.nailz, the image from Lina Nail Art Supplies Mad for Mandalas was stamped directly onto the nail using Hit the Bottle As Black as Night (see the black outline), and then the image was colored in right on the nail. We highly recommend our Detail Brush for coloring in your mani, as we created it just for this purpose!
We hope you enjoy trying out these exciting nail art techniques! These are intermediate to advanced techniques, so please don't worry if it seems difficult at first. You can practice on your nails, on practice nails, and even right on your Ultimate Nail Mat!
These are two fun, incredibly versatile nail art techniques that allow for endless creativity, so give it a go and have some fun! When you have created some new nail art, please share it with us on Instagram at @lanternandwren, and with the wonderfully supportive community in the Leadlighting & Reverse Stamping Nail Art Group!
]]>These thread organizer cases will not fit any polishes that are over 3" long, but fit smaller polish bottles, such as MoYou London, Zoya, CC, BMC, Essie, etc. These cases will hold up to 46 bottles. The price can vary from $8-$10 per case.
For larger bottles of polish, such as Hit the Bottle, ILNP, Color Club, Moonflower Polish, Ellison's Organics, OPI, etc., this Makartt box with larger compartments is a great option. There is both a 48 bottle and 60 bottle option.
In use:
]]>
In the video below, Kyong shows us how she does a new water marble inspired by a Kleenex box! She includes some great tips on getting the best water marble nail art you can, including how to know if your water is clean enough when you begin and how to handle air bubbles.
Give it a try! To create your own water marble similar to what Kyong did here, you'll need:
Kristi includes tips on why to use a lint roller when you stamp (what?!) and how to make sure you get an easy clean up when you're done. This video is a great place to start learning how to nail stamp!
Create the look yourself:
Mani Defender - Liquid latex cuticle barrier
Marianne Nails 77 - Mini nail stamping plate
Dixie Diamond Duo - Squishy nail stamper
MoYou London Black Knight - Black stamping polish
I'll Stick Wichu - Base coat
Find more from Beginnails on Instagram at @beginnails and on her blog at www.beginnails.blogspot.com. Thank you, Kristi!
]]>This tutorial is ideal for beginners, but there are some neat tips in here that even veterans will enjoy.
Products used can be found here:
Mani Defender - Liquid latex cuticle barrier
Irresistible - Matte nail lacquer
Unforgettable - Matte nail lacquer
I'll Stick Wichu - Base coat
Find more from Beginnails on Instagram at @beginnails and on her blog at www.beginnails.blogspot.com. Thank you, Kristi!
]]>